Citrix Provisioning Services in Azure Part 2
Part-I of this article was published when Citrix PVS was in Preview, this part is published when Citrix PVS is GA. Now many enterprises must have already started planning to start the Citrix PVS in Azure and this article will help them. In today’s article, I will show how to install Citrix PVS in Azure.
Citrix Provisioning (PVS) on Microsoft known as the Azure Citrix Provisioning (PVS), one of Citrix’ flagship products, is now generally available in Azure.
Customers can easily setup and configure PVS infrastructure in the same way as on-premises and PVS Servers on Azure can stream VDAs from a single copy of a vDisk to all target VMs
PRE- REQUISITES
When installing PVS in Azure, all the same, system requirements apply to the on-premises version of PVS.
- A Citrix License Server installed on a virtual machine in Azure
- An Azure Subscription
- SQL/ SQL Express – Azure SQL is not yet supported
- Cloud Connector in the Azure Subscription
- Citrix Virtual Apps and Desktop Service Subscription
- An Azure Subscription
SUPPORTED FEATURES
There are some limitations when using Citrix PVS within Azure. The following are the supported features:
- UEFI Boot of an Azure Gen 2 virtual machine. This is a 20 MB disk that contains the Citrix Provisioning UEFI boot application
- Targets – 64-bit Windows 10, Windows Server 2016, and 2019 target VMs
- Citrix Virtual Apps and Desktop Wizard are available to create Target Devices.
- Export wizard in the PVS console to create and update the Machine Catalog
- Create and update a PVS image using Citrix Provisioning versioning or reverse engineering.
- Power management of targets from the Citrix Virtual Apps and Desktops Service, or Azure Portal and Azure APIs.
Active Directory support using one of the following means:
- Azure Active Directory Domain Services that add Active Directory (AD) support to your Azure Active Directory (AAD) Tenant.
- Your existing on-premises Active Directory setup over an ExpressRoute connection.
- Active Directory domain controller VMs installed into your Azure subscription.
CITRIX PVS LIMITATIONS
There are some limitations to be aware of when configuring PVS in Azure
- 32-bit operating systems are not supported.
- Existing on-premises Citrix Provisioning vDisks are not supported. You must create vDisks for the Azure VMs. PXE and ISO boot of master and target VMs are not supported, because Azure does not support them.
- Booting to BIOS is not supported.
- Generation 1 VMs are not supported. Only Generation 2 VMs are supported.
AZURE LIMITATIONS
- No more than 2,500 VMs can be created in a single subscription
- Master machine configuration must be compatible with target devices.
- If you plan to use Azure File Services to provide storage for vDisks, you must create a Premium Storage Account. It must be in the same region as the PVS server.
- The CVAD wizard uses a Standard SSD disk for boot and cache, and Accelerated Networking is not enabled in target VMs. It is supported by the PVS Servers and is recommended.
STEP 1 – CONFIGURATION OF AZURE SUBSCRIPTION
In order to ensure that PVS works correctly in Azure, we must ensure that the feature flag for ReserveMacOnCreateNic is turned on.
In order to complete this task, we must meet the following PowerShell commands
- Install-Module Az
- Import-Module Az
- Connect-AzAccount
- Register-AzProviderFeature -FeatureName ReserveMacOnCreateNic -ProviderNamespace Microsoft.Network
- Register-AzResourceProvider -ProviderNamespace Microsoft.Network
STEP 2 – INSTALLING CITRIX PVS
- Prepare a virtual machine with a minimum of 2 vCPUs, 8 GB or 12 GB each for the PVS Server VM.
- Install SQL Server Express
- Install a Citrix license server and install an appropriate Citrix license
- Install the PVS server and Console as per on-premises instructions
- Ensure you choose Cloud when prompted during the installation.
- Choose the license server during the PVS installation when prompted.
- I used a locally attached disk during testing or add an additional disk for the PVS Store – This can be a file share implemented by a Premium Azure Storage Account, or Azure Net app Services
Now that the PVS server is installed, we can start to create a master image for use within Azure. The following steps are followed when creating the master image
- Create a Master Image Virtual Machine in Azure – Gen 2 64-bit Windows 10, Windows Server 2016, 2019 target VMs
- Install the VDA Software on the Image, Adding the cloud connector as the DDC.
- Install the Target Device Software
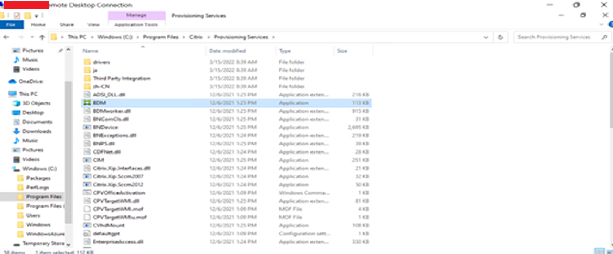
After the software installations are complete, run the BDM.exe program from
C:\Program Files\Citrix\Provisioning Services\BDM.exe
to configure the boot disk
Add the option for the PVS Server FQDN of the Server IP Address as shown below.
BDM configuration: –
Once you installed Target device package than GO to C:\windows\program files\provisioning services and click BDM.
The below screen will appear
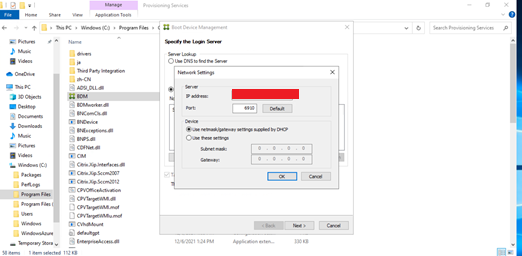
Add the PVS server IP and Click OK,
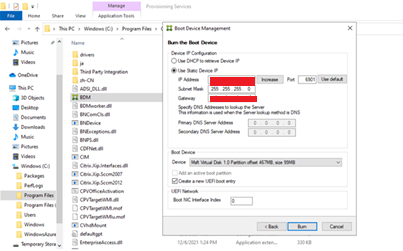
Provide the Static IP, subnet mask, and gateway, choose the option on the boot device for “Msft Virtual Disk” and click on the option for Create a new UEFI boot entry and click Burn.
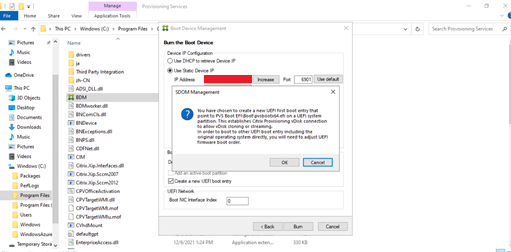
Click ok.
Preparing Citrix Imaging wizard
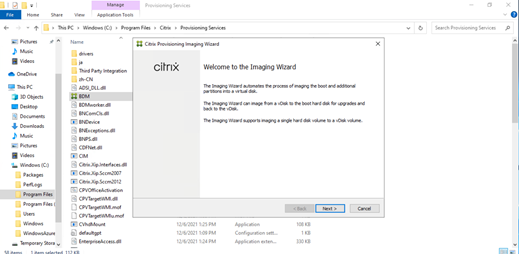
Click on Citrix Imaging wizard in the start menu run the Citrix Imaging wizard,
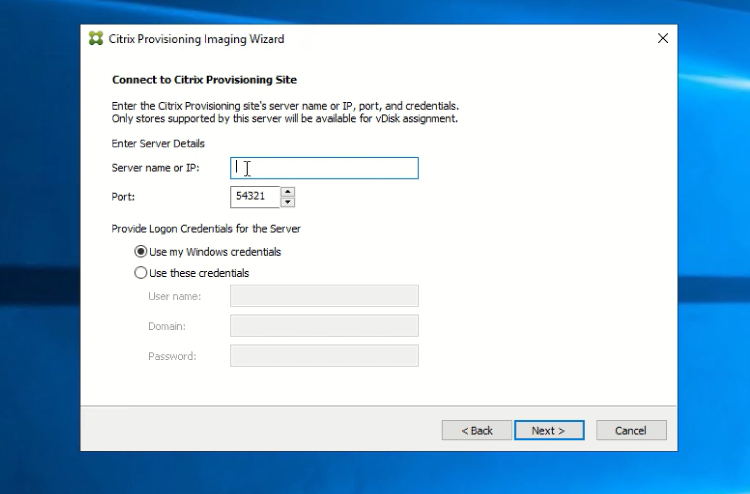
Add the name of your Citrix PVS server, select window credentials and click next.
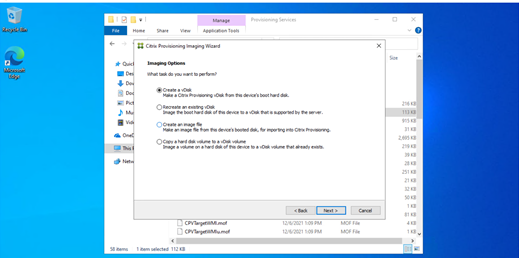
Choose to Create a vDisk

Enter a name for the Target Select the device name.
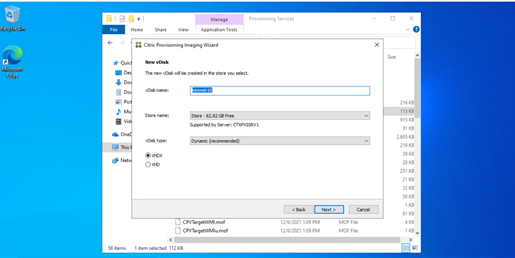
Enter a name for the vDisk, choose the store created on the PVS server, or the Azure file share you selected during the PVS installation
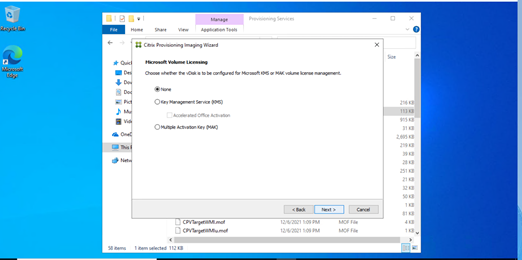
select none and next.
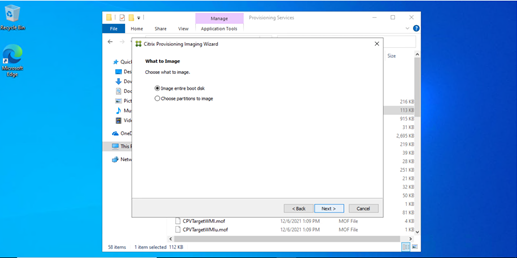
Choose “Image entire boot disk”
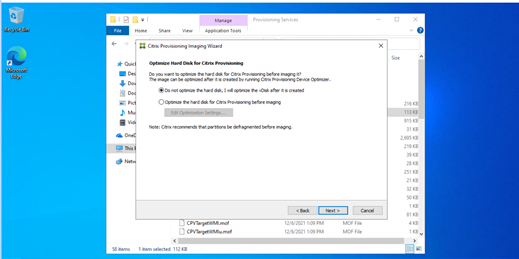
Choose to optimize the hard disk
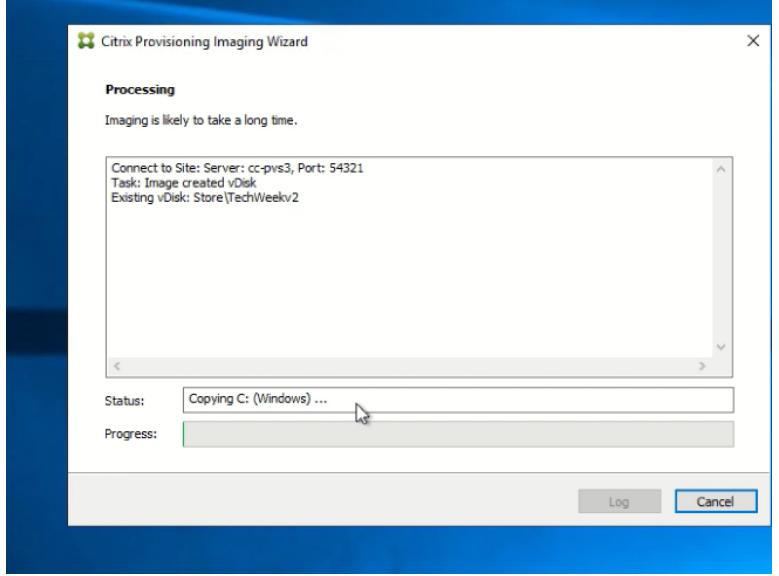
The imaging wizard will begin the imaging process and will create the vdisk.
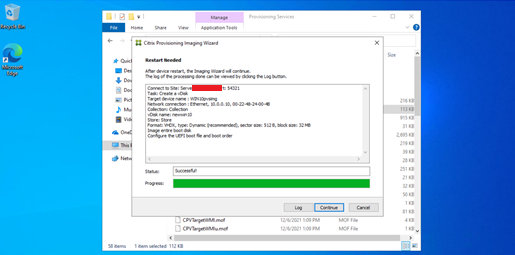
vdisk created successfully.
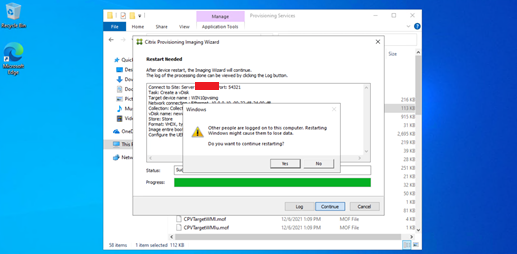
Click yes to restart PVS Master
Once the machine restarted and log in to begin the imaging process. Once this step is complete, change the properties of your PVS vDisk to read-only. This will allow for disk streaming.
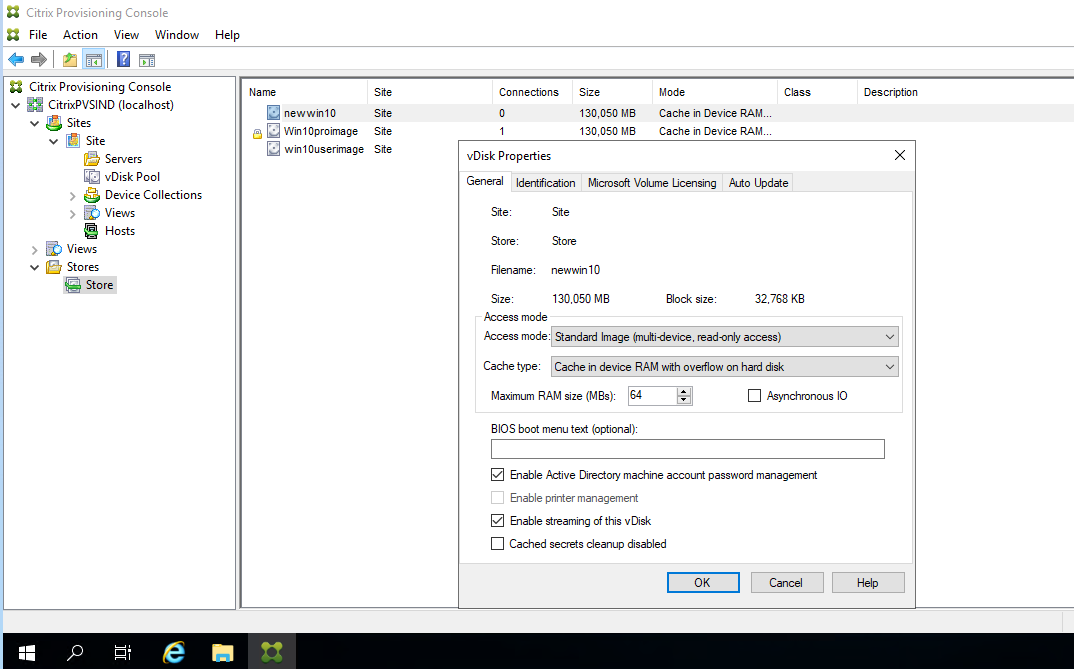
Login to the PVS console server, open the PVS console→Site→vdisk Pool→ select the vdisk properties and go to general to change the private mode to a standard image.
In the next and last part of the blog, I will configure the Citrix Cloud part. That’s all for today, hope you have a good day ahead.

New watermark in Azure Virtual Desktop and how to implement the same step-by-step in your AVD environment

Citrix Cloud Workspace – How to configure Ping ID as the secondary IDP (MFA) when the Primary IDP is Azure AD