Citrix Provisioning Services in Azure Part 3
This article is a continuation of three-part blog series on the installation of Citrix PVS on Azure. Before you read the article you should read the first two parts of the article.
1st part of this blog series can be found here.
2nd part of this blog series can be found here.
STEP 4 – CONNECTING TO CITRIX CLOUD
Within the Provisioning server console, we can use the Citrix Virtual Apps and Desktop wizard to create the following.
- The Target VMs in the Device Collection
- The computer accounts in AD
- Populate the machines in Citrix Studio
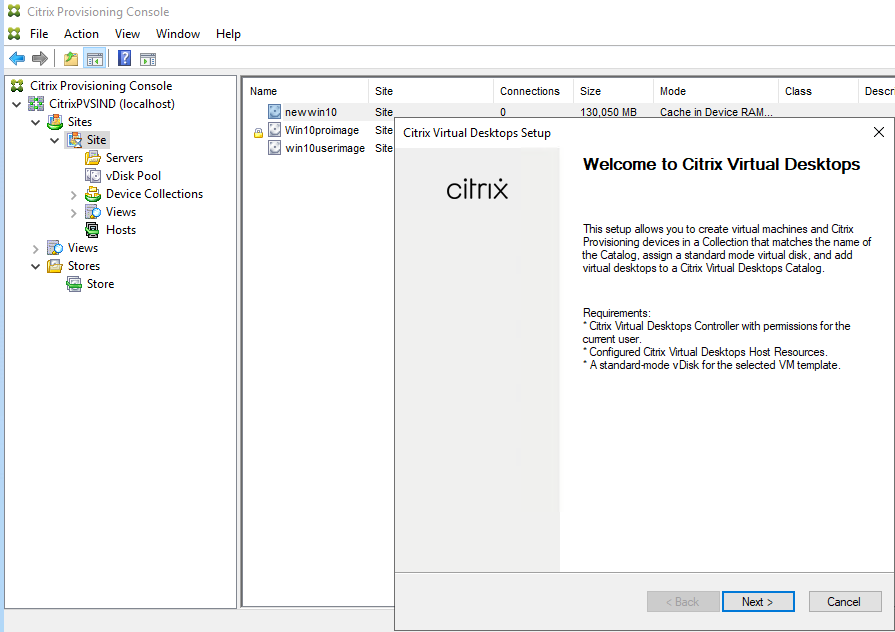
Right-click on the PVS Site and Choose “Citrix Virtual Desktops Setup Wizard
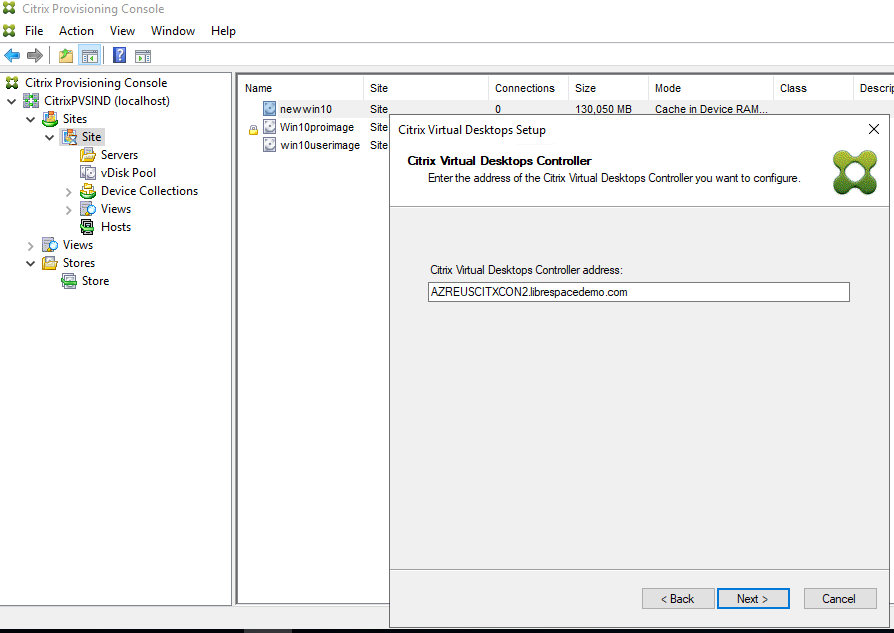
Enter the controller address which is the Citrix Cloud Connector FQDN. Click next
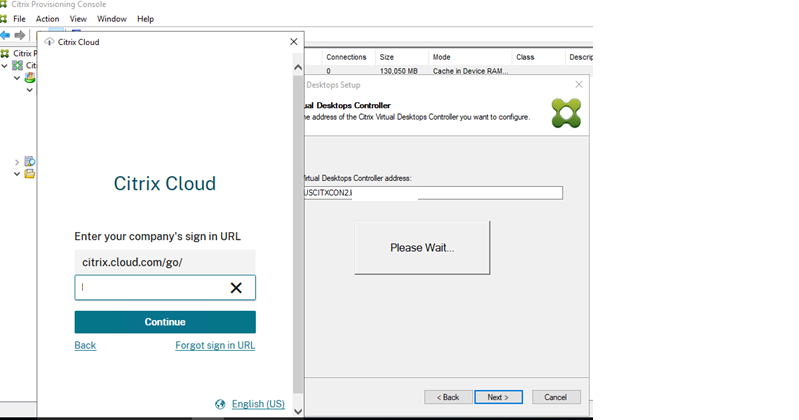
Enter your company customer ID or provide the username and password.
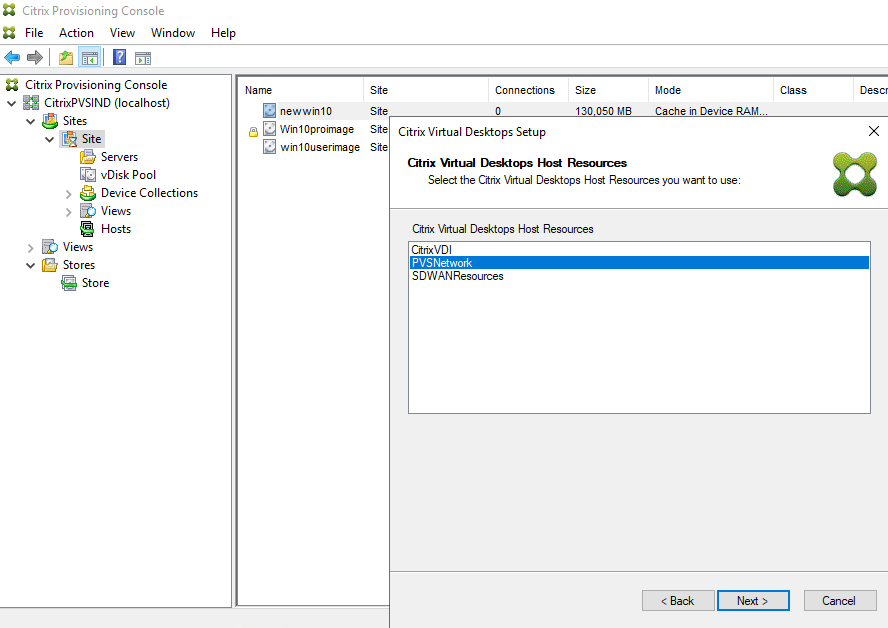
If you have multiple Citrix Cloud tenants, choose the correct tenant. And then choose the Citrix Virtual Host Resource
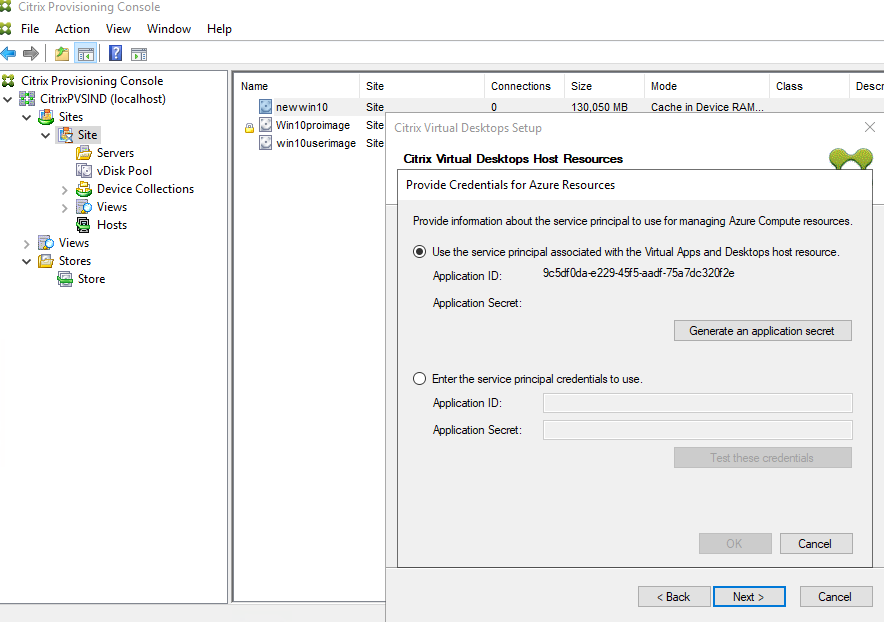
Enter the CVAD service Application ID and Secret key on the service principle
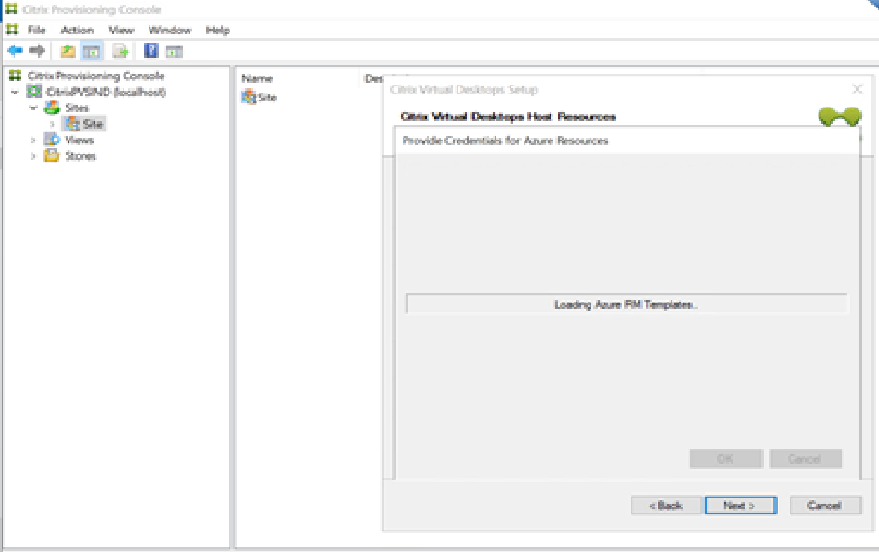
When prompted choose the correct resource location with the Resource Group that you wish to use
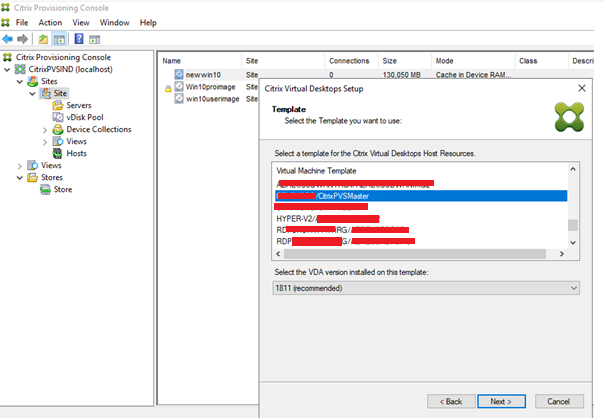
Choose the master image machine as the template machine that will be used to create the target VM’s
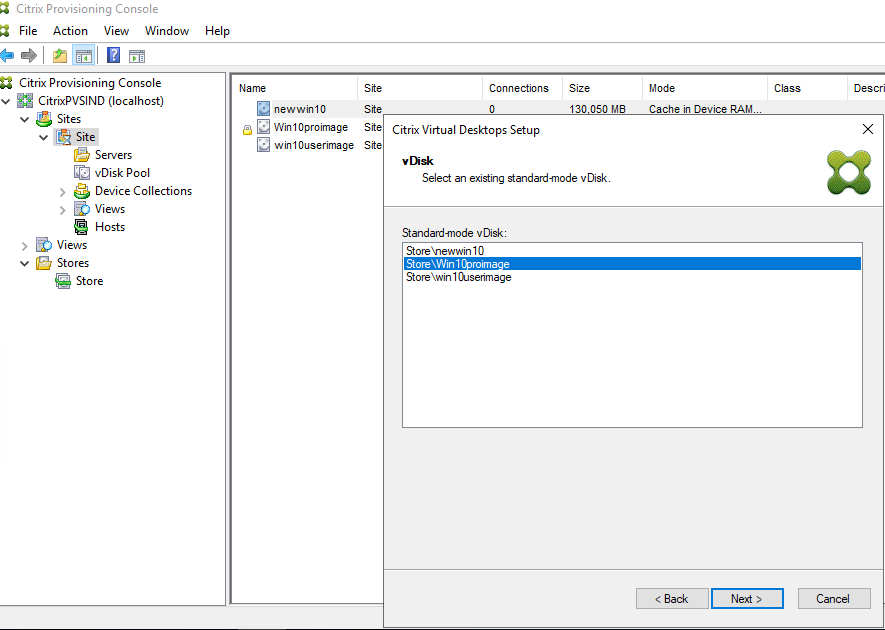
Select the existing vdisk
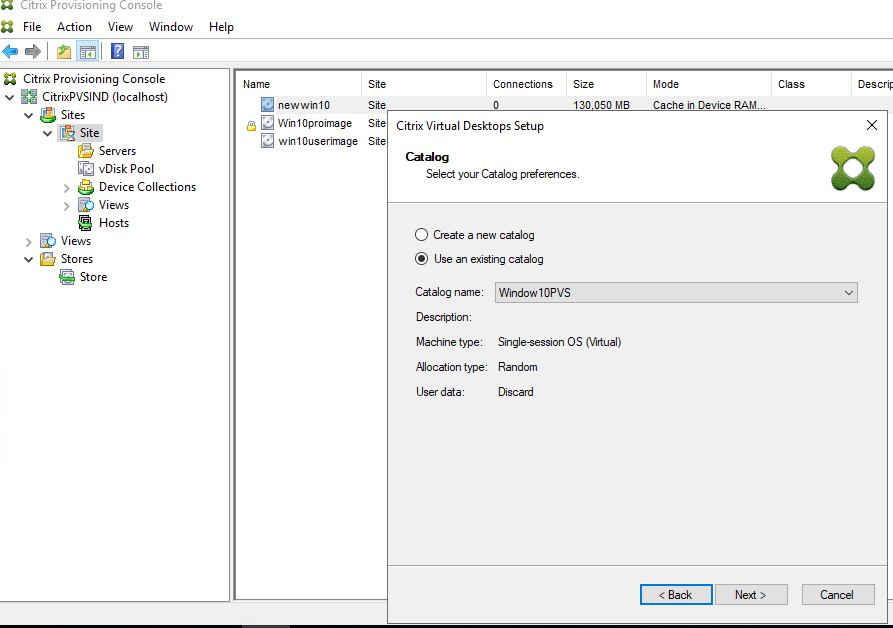
Now, Select Create new catalog or choose an existing catalog. This machine catalogue is created within the Citrix Studio console within Citrix Cloud
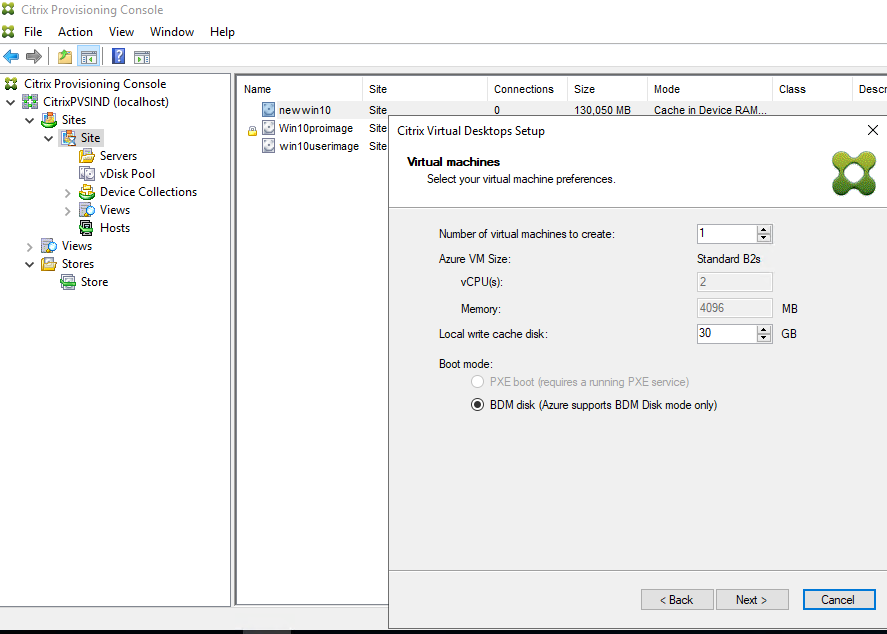
Choose the size and the number of VM’s. Note that the machines will use BDM Disk by default.
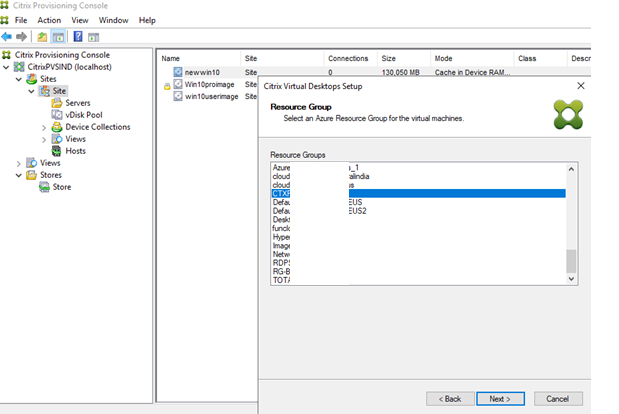
Enter the resource group that the target VM machines
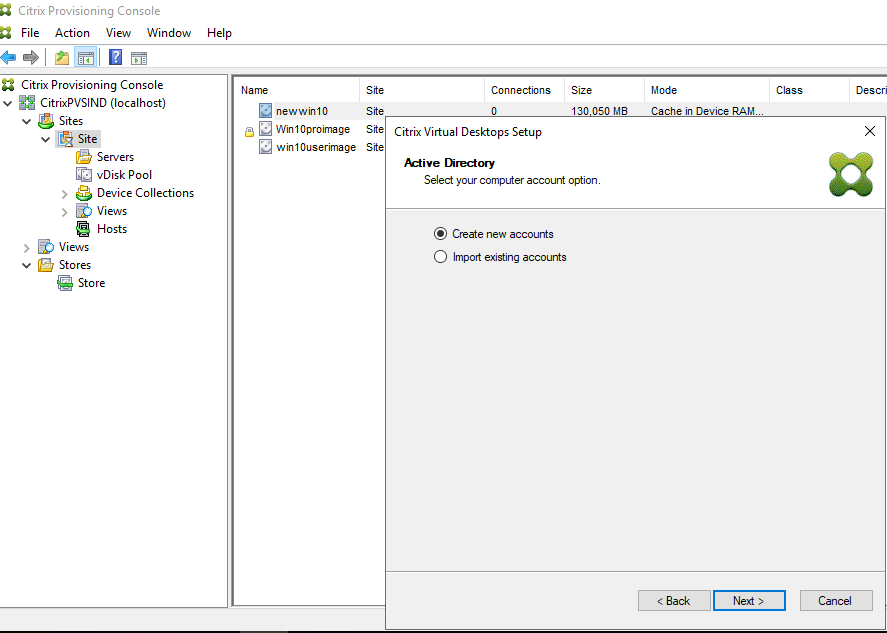
Choose to create new machine accounts
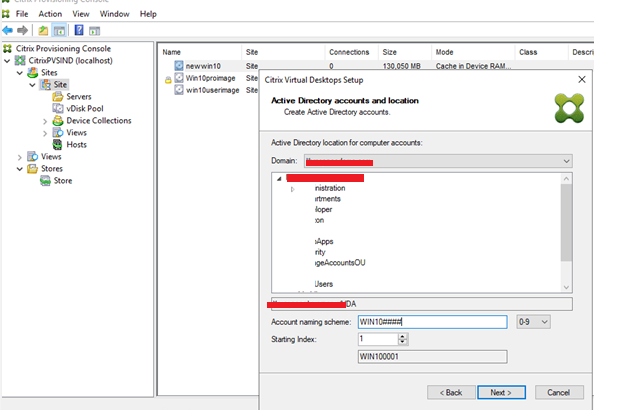
Choose the correct domain and OU for the computer accounts within your domain and Name the VDI
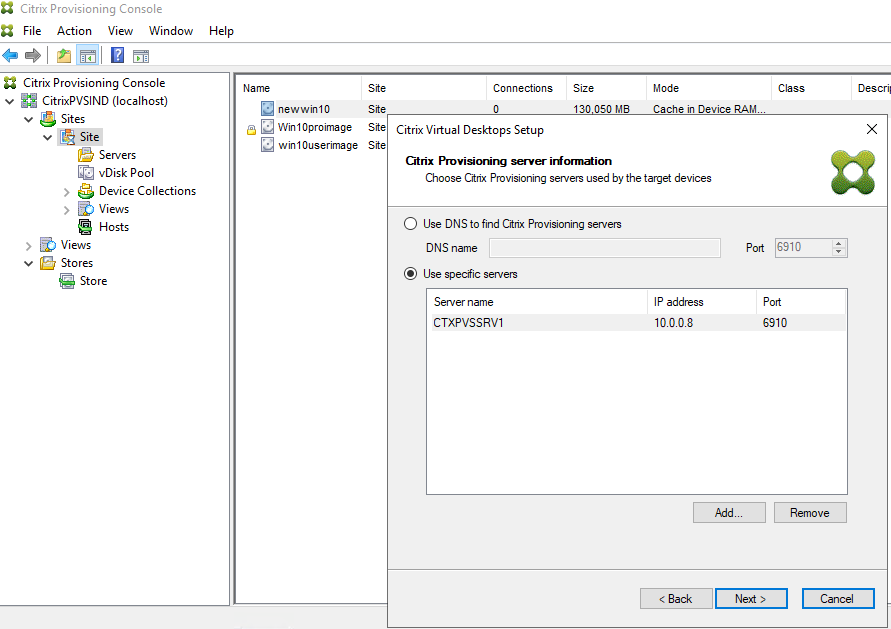
Choose the PVS Server and add the FQDN or IP Address
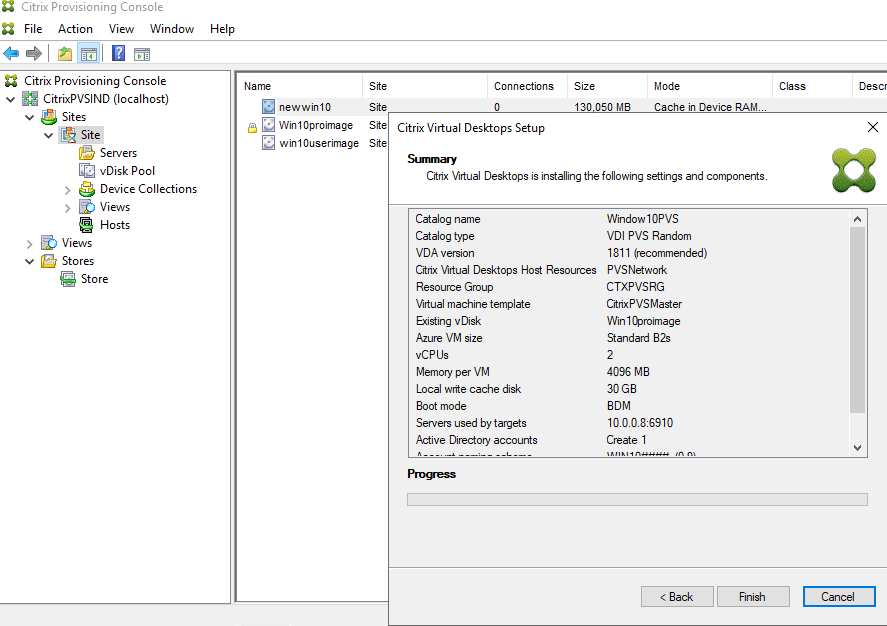
Click finish once you have reviewed it.
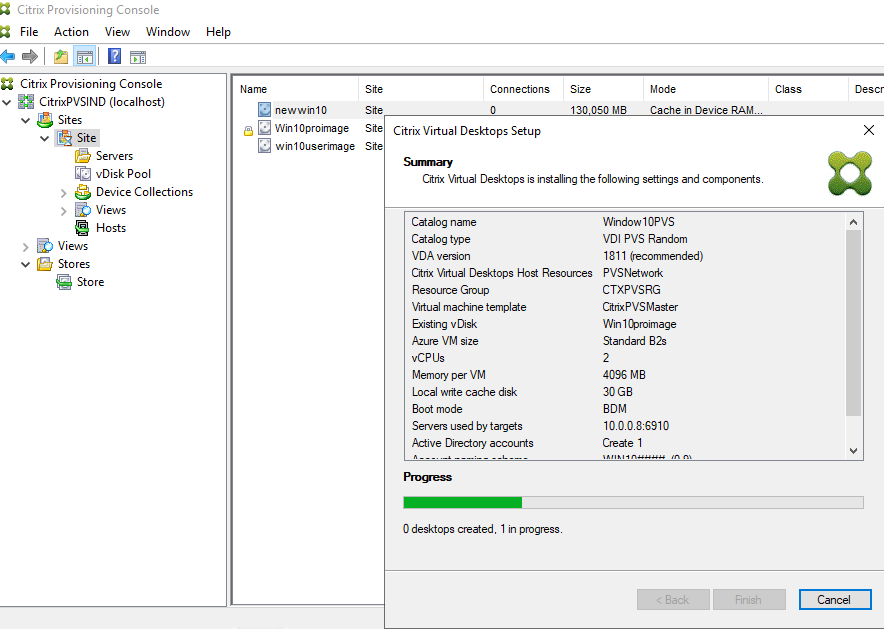
Target machines are created, and added to the PVS server device collection, and the machine catalog is created within Citrix Cloud
The next step is machine creation

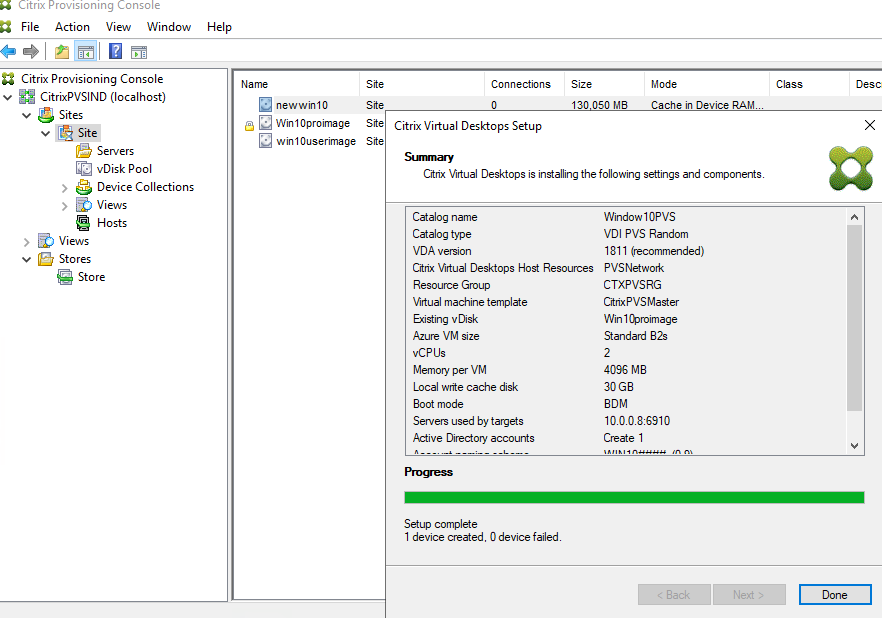
Now you can see the Machine is created successfully.

Lastly, I have Verified the machine populated in the Citrix console and registered.
That’s all for today, you have now seen how to create PVS-based VM;s in Azure. PVS share was almost 80% on all the machine provisioning across all types of Citrix Deployment it was so popular because of its versioning and rollback feature, and it was missing for Azure. With this development and when this is generally available in Azure, I think it’s time to start deploying your workloads with the PVS. We are also doing extensive testing now and I will let you know if I find anything about PVS near future. So far so good, please free to start with PVS in Azure in all your new deployments.
Thank you all and have a good day ahead.
Special Thanks to my colleague Niranjan Ponnur who has contributed in this blog series.

How to Access Citrix Monitoring Database Data from Other Applications with O-Data REST API

Deploy a DevOps CI/CD platform for Citrix and AVD Automation with Jenkins in Ubuntu Server 22.04