SQL Server 2016 Enterprise Always on installation and configuration in Windows Server 2016
Dear friends today I have installed the SQL server always on at whyazure.in domain
The prerequisite for this is the configuration of a windows cluster. The steps to configure a windows cluster I will discuss in another post.
Once the windows cluster is created please install the SQL server standalone install. The details steps were available in article published by me earlier. The next step is to go the SQL server 2016 configuration manager and select the SQL server instance and enable the always on high availability feature as shown below.
The next step is to login to SQL server management studio and create the availability group.
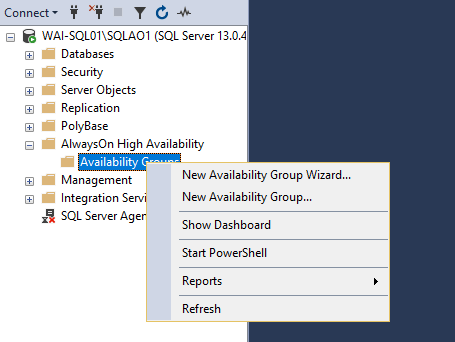
Once you click the same and you can see the following screen
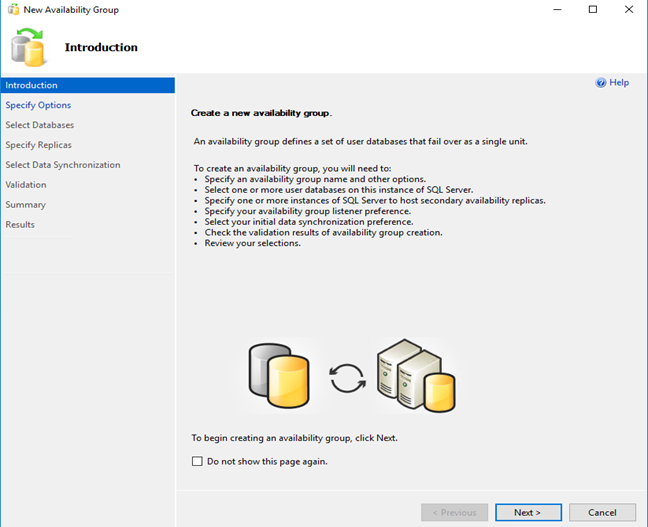
Define your availability group name and click on Next

Once you click on next you can see the following
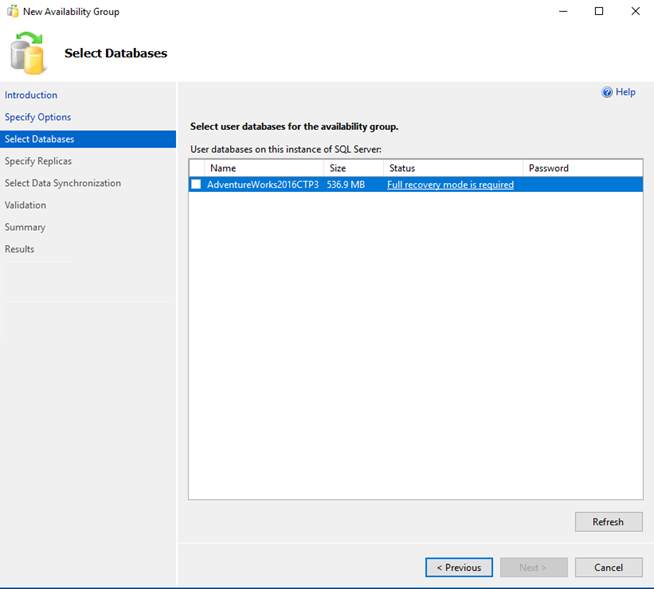
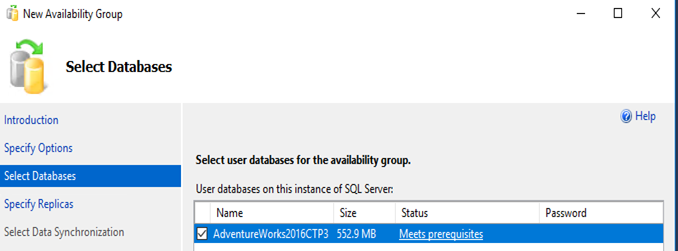
Here you can see whether the db meets the prerequisites
-
Database should be in full recovery mode.
-
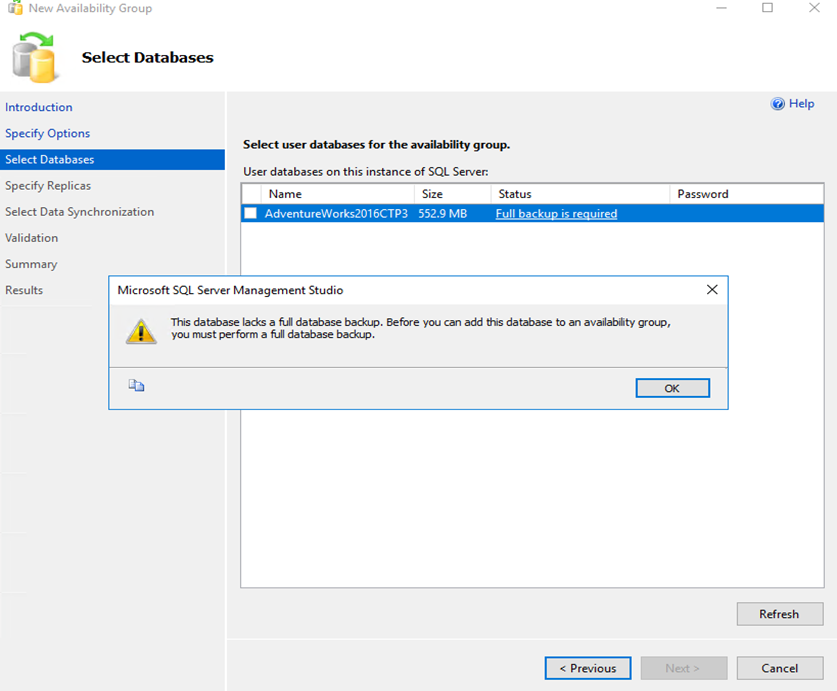
You should make a full backup to add the DB into the Availability Group
If these are not selected, you are going to see the following message
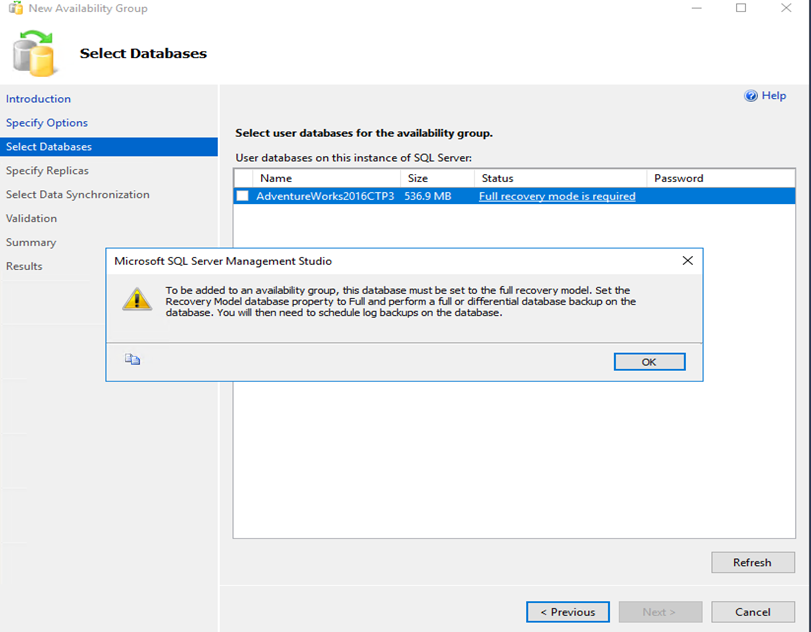
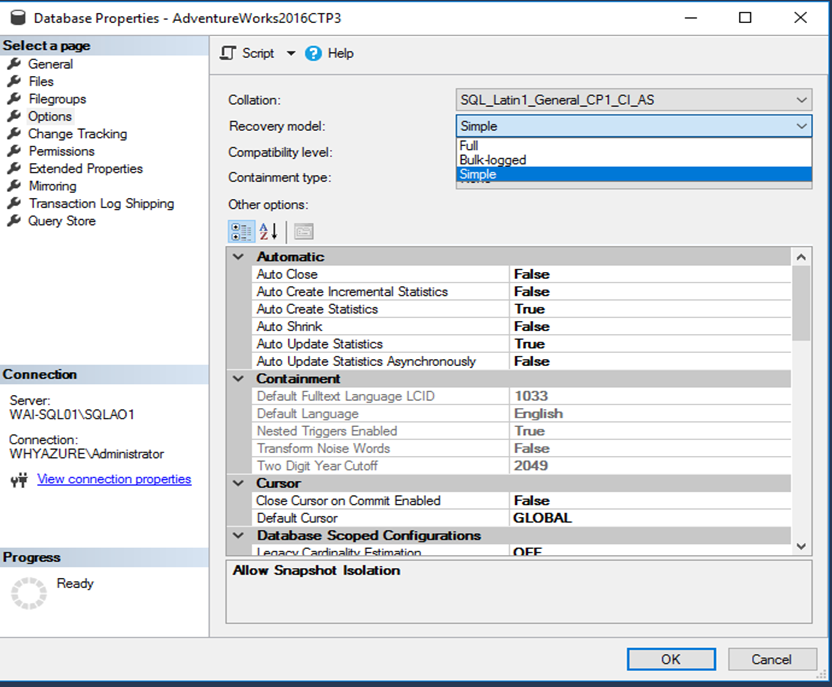
Here are the steps to change the recovery model of the database.
- Expand Databases, and, depending on the database, either select a user database or expand System Databases and select a system database.
- Right-click the database, and then click Properties, which opens the Database Properties dialog box.
- In the Select a page pane, click Options.
- The current recovery model is displayed in the Recovery model list box.
- Optionally, to change the recovery model select a different model list. The choices are Full, Bulk-logged, or Simple.
- Click OK.
If the database is not selected for full backup you will going to see the following message.
To enable a database for the full backup mode please do the following:
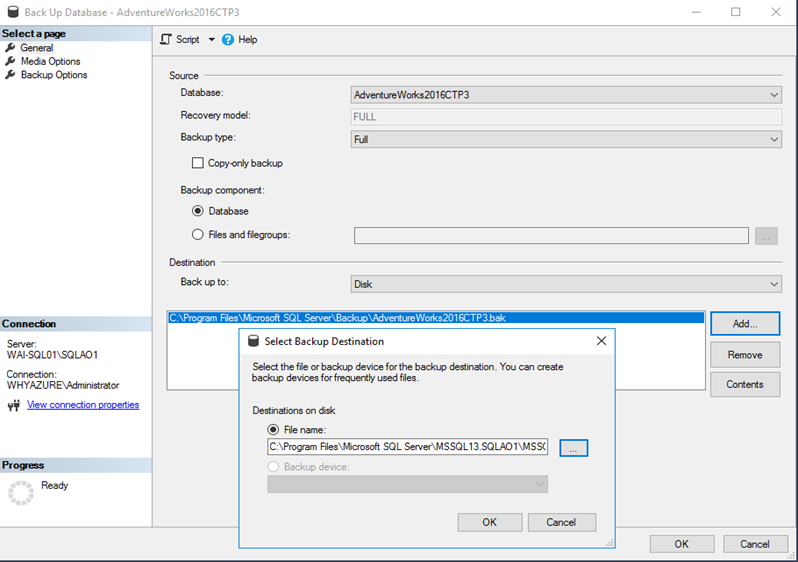
Please note that backup folder should have proper permissions otherwise you may get the access denied error what I have seen and very well documented in this article here
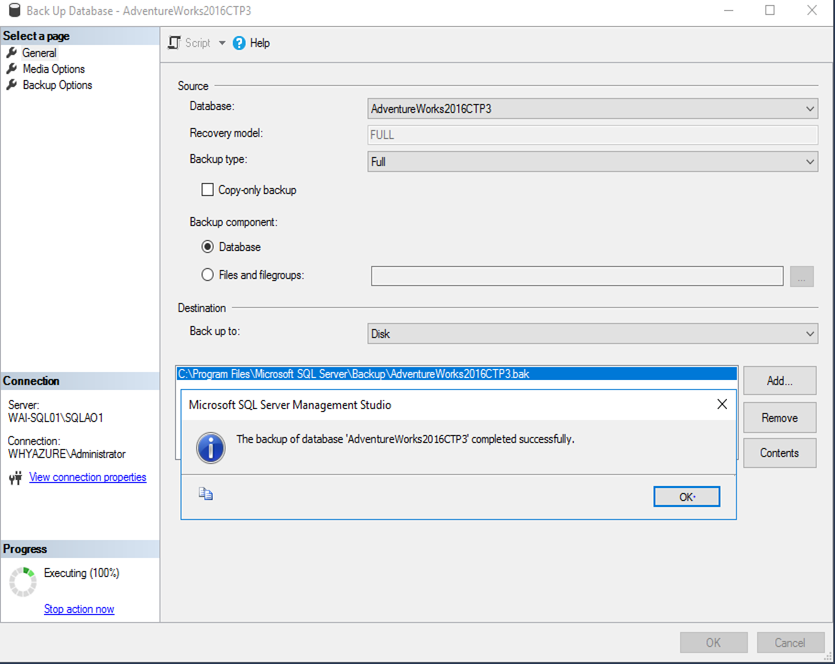
Once the backup is taken you will see a screen like this.
Once both the requirements are meet we can see the following. (Meets prerequisites)
Specify Replicas.
This page applies to the New Availability Group Wizard and the Add Replica to Availability Group Wizard of SQL Server 2016
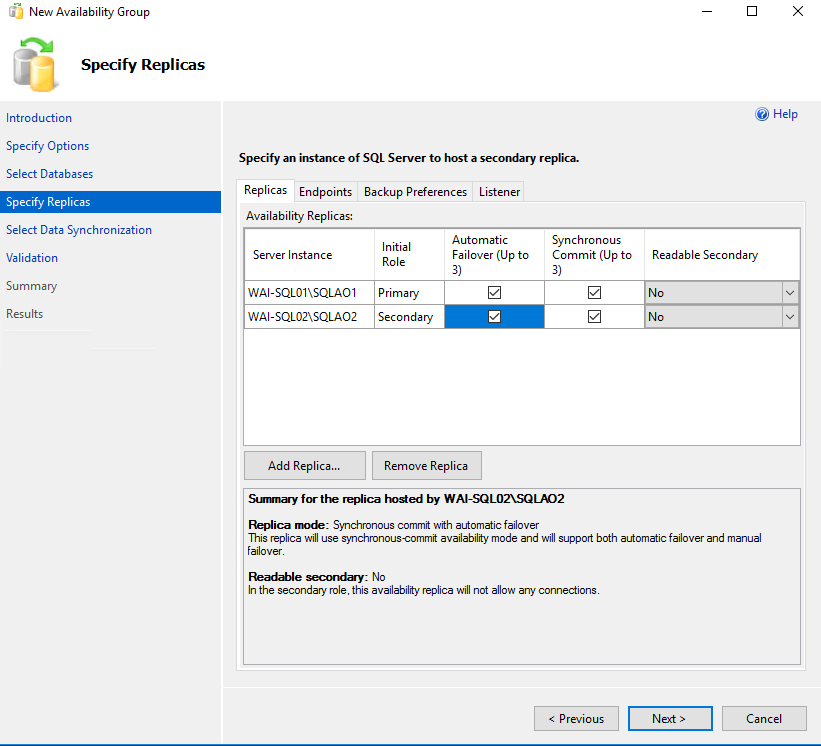
If a server instance that you to use to host a secondary replica is not listed by the Availability Replicas grid, click the Add Replica button.
Add Azure Replica button to create virtual machines with secondary replicas in Windows Azure.
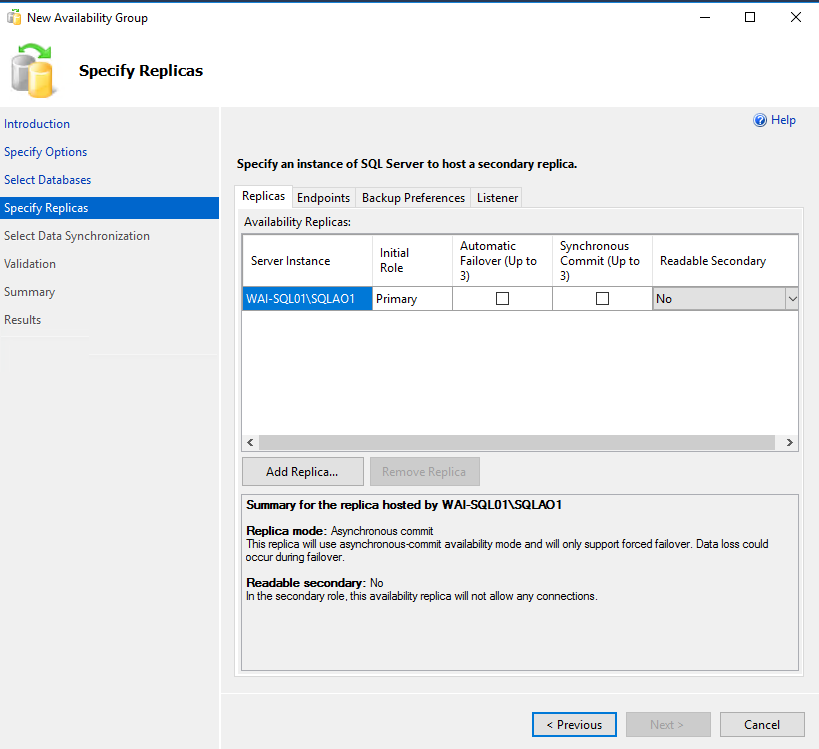
Add the secondary database
Specify the end point port
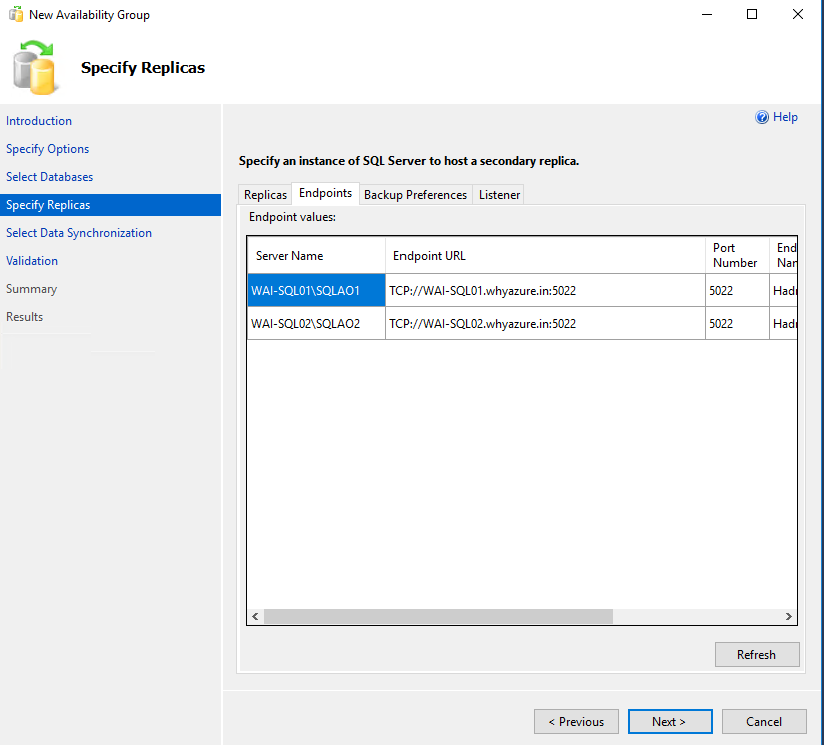
Please note that you need to open this port in the firewall.
Backup Preference
Use this tab to specify your backup preference for the availability group as a whole and your backup priorities for the individual availability replicas.
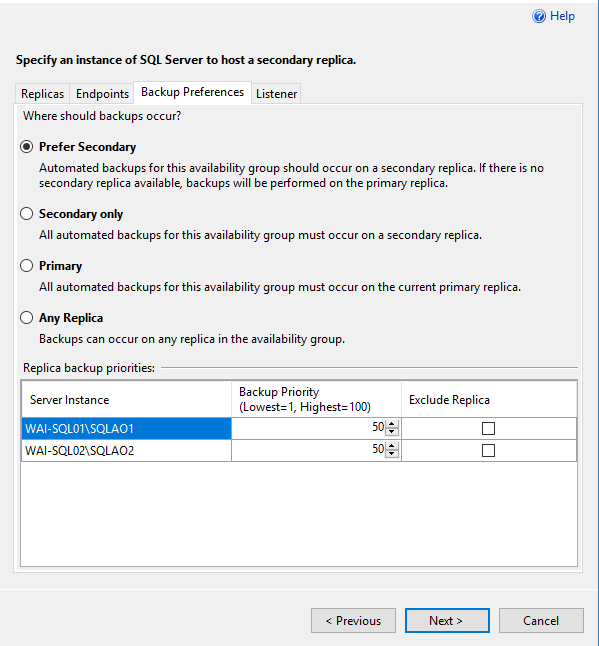
Select the backup preferences as shown above.
Listener
An availability group listener is a virtual network name (VNN) to which clients can connect in order to access a database in a primary or secondary replica of an AlwaysOn availability group. You point applications to the listener (which is registered with DNS) and directs traffic in the AG
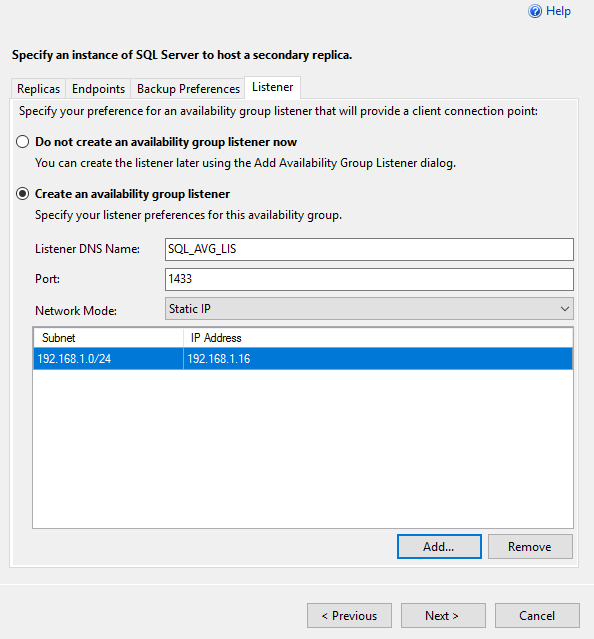
You should also create a DNS record in your DNS server for this listener
When you click next you will get the following message.

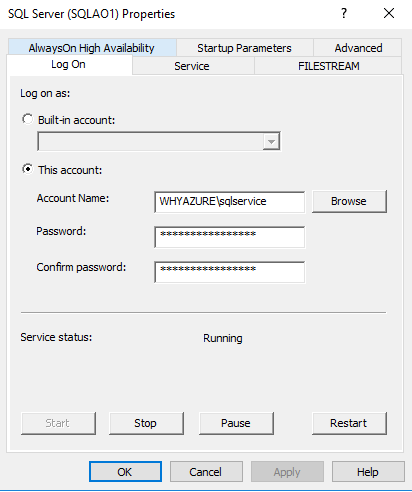
For this you actually need to change the service account of the SQL server services in both the computers which I have not done at this stage however I have done it later just before the last step when I got an error.
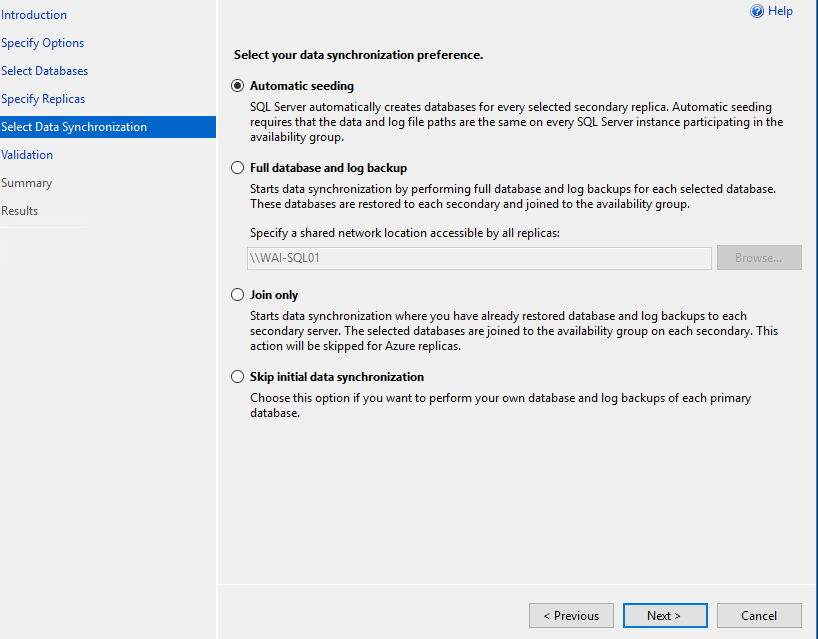
Select Data Synchronization
Use the Always On Select Initial Data Synchronization page to indicate your preference for initial data synchronization of new secondary databases. This page is shared by three wizards—the New Availability Group Wizard, the Add Replica to Availability Group Wizard, and the Add Database to Availability Group Wizard.
The possible choices include Full, Join only, or Skip initial data synchronization. Before you select Full or Join only ensure that your environment meets the prerequisites.
In My I have choose Full
For each primary database, the Full option performs several operations in one workflow: create a full and log backup of the primary database, create the corresponding secondary databases by restoring these backups on every server instance that is hosting a secondary replica, and join each secondary database to availability group.
Select this option only if your environment meets the following prerequisites for using full initial data synchronization, and you want the wizard to automatically start data synchronization
The next step is to run the validation test and I got the below error
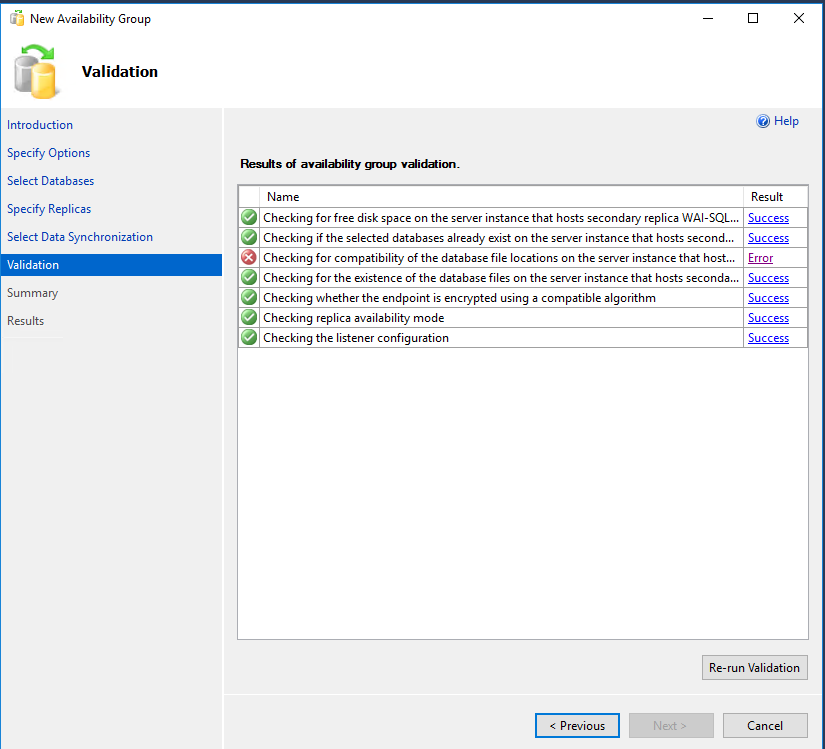
I have resolved this error by creating the same data path in both the server. This article describes more on this issue.
Once I re run the test I have found the following summary screen.
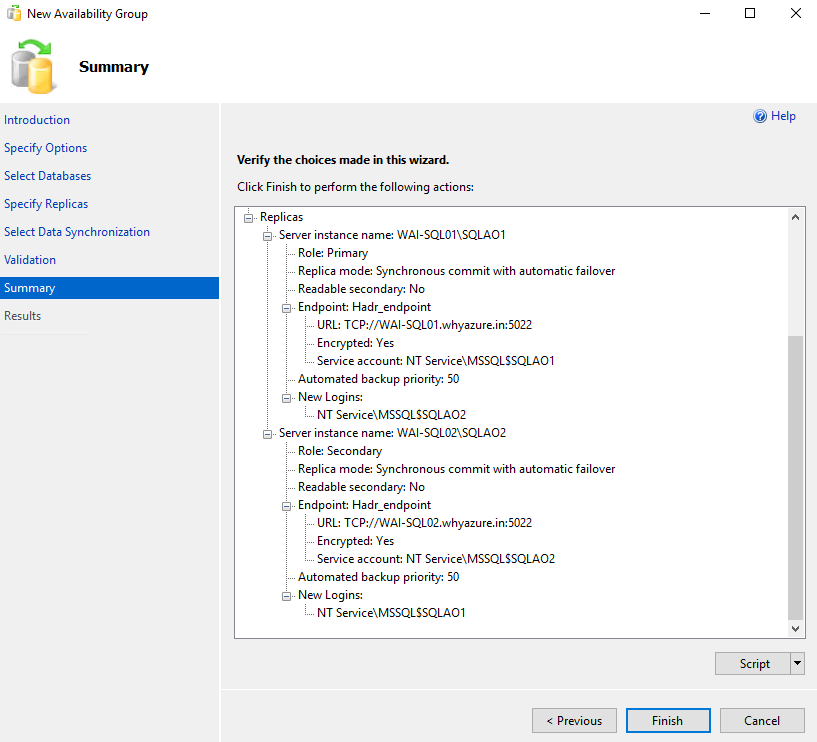
Once I click on the finish button I have received the following error message.
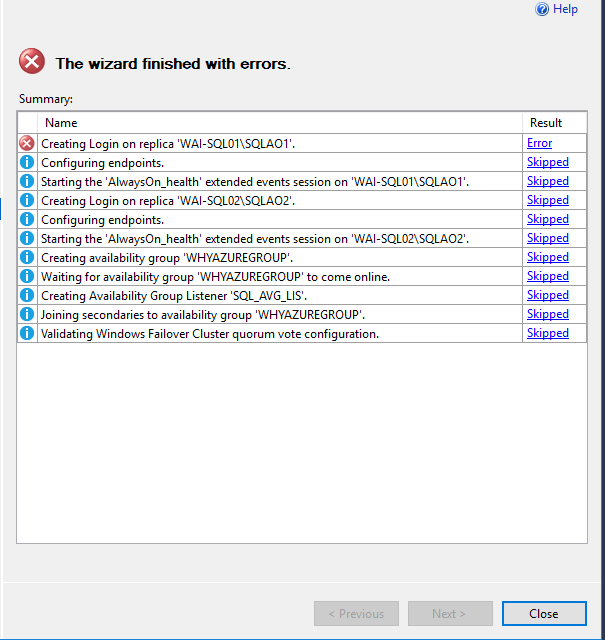
To resolve this error I need to change service account of sql to a domain account like whyazure\sqlservice as you can see below
Once the error is resolved you can see the following screen
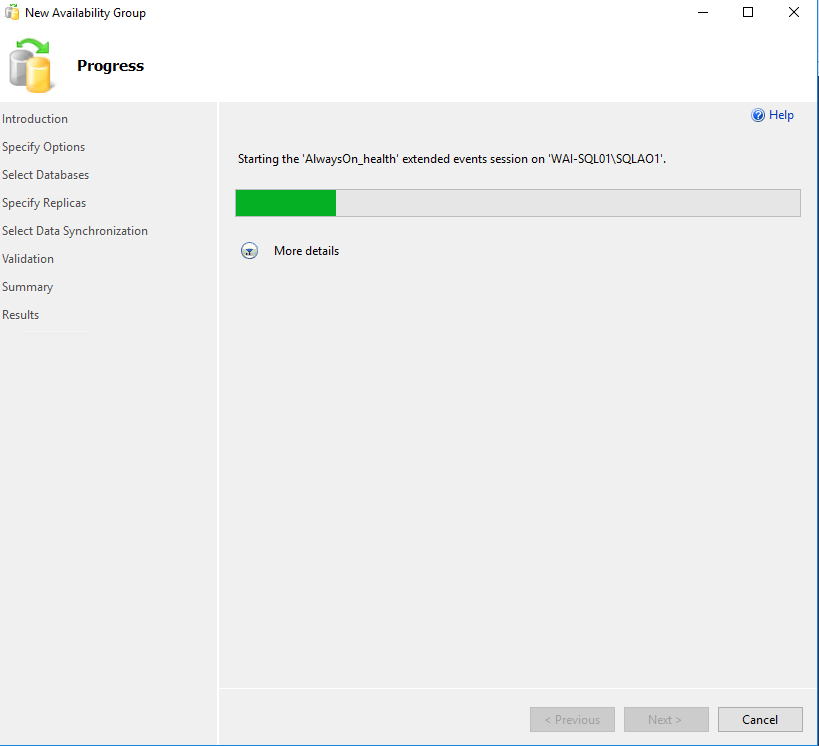
After that the SQL Availability Group has been created successfully

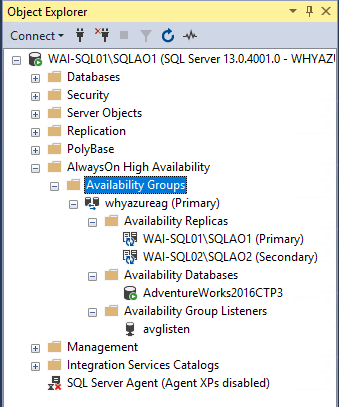
Once it’s created you can see the following screen under the Availability Group Tree in SSMS
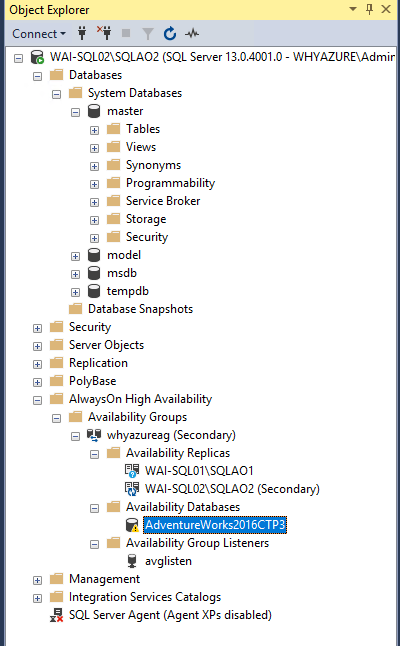
You can see the following screen in the 2nd windows server
Hope you like this post. We will bring more on this later.


