How to create and deploy Windows 365 Enterprise Cloud PC Custom Images
Hello Friends, today I will show you how you can create a Custom Image for the Windows 365 Cloud PC.

To create and deploy custom images for Windows 365 Enterprise Cloud PC, you’ll need to follow these general steps.
1. Prepare a virtual machine (VM): Set up a virtual machine running Windows 10 or Windows 11 on your preferred virtualization platform, such as Hyper-V, VMware, or VirtualBox. Install any required applications, configure settings, and customize the VM according to your needs.
2. Install Windows Updates: Ensure that the VM is fully patched with the latest Windows updates. This will help ensure security and compatibility with Windows 365.
3. Install drivers: Install the necessary drivers for the VM’s hardware components to ensure proper functioning. You can obtain the drivers from the hardware manufacturer’s website or use the default drivers provided by the virtualization platform.
4. Install applications: Install the applications you want to include in the custom image. This can include productivity software, line-of-business applications, and any other software required for your organization.
5. Customize settings: Configure the desired settings for the VM, such as desktop wallpaper, taskbar layout, power settings, and any other customization options.
6. Optimize performance: Fine-tune the VM for optimal performance in the cloud environment. This may involve adjusting system settings, disabling unnecessary services, and optimizing resource usage.
7. Sysprep the VM: Sysprep (System Preparation) is a Windows tool used to generalize the VM’s image and remove any unique system-specific information. This step prepares the VM for deployment to multiple machines. Run the sysprep tool on the VM using the appropriate options and generalize the image.
8. Capture the image: Once the sysprep process is complete, capture the VM as an image. This involves creating a virtual hard disk (VHD or VHDX) file of the VM, which will serve as the basis for your custom image.
9. Upload the image to Azure: Transfer the captured image to Azure storage. You can use Azure Blob Storage to store the image file. Make sure to secure the storage account appropriately.
10. Create a custom image in Windows 365: In the Azure portal, navigate to the Windows 365 service and create a custom image using the captured VHD file. Provide the necessary details, such as image name, description, and storage location.
11. Provision Windows 365 Enterprise Cloud PCs: With the custom image created, you can now provision Windows 365 Enterprise Cloud PCs using the image. Specify the custom image during the provisioning process to deploy Cloud PCs based on your customized configuration.
As I come to the end of this blog post, I want to take a moment to express my heartfelt thanks to each one of you who has taken the time to read my words. Your support and engagement mean the world to me, and I’m truly grateful for the opportunity to share my thoughts and ideas with such an amazing audience. Once again, thank you for being a part of this incredible journey. Your presence, encouragement, and enthusiasm have fueled my passion for writing, and I’m truly honored to have you as readers. I am immensely grateful for your time, attention, and the opportunity to connect with you through this platform. Remember, this is not just my blog; it’s our blog—a place where ideas can flourish, discussions can thrive, and knowledge can be shared. I invite you to stay connected, share your thoughts, and join me on this wonderful adventure.
—

Admins now can use Windows Autopilot device preparation to provision Windows 365 Frontline shared devices as best practice
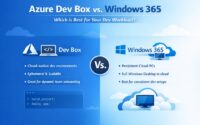
Which one to choose between Microsoft Azure Dev Box and Windows 365 for your development workload