Installing and Configuring the Citrix Licence Server when you already have Citrix Cloud

Every Citrix Virtual Apps and Desktops, StoreFront, or NetScaler deployment eventually comes back to the same quiet, unglamorous component: the License Server. Nothing in the environment will check out a license, and admins will not get usage data, unless this piece is installed and configured correctly. This walkthrough covers the full process from running the installer to registering the server with Citrix Cloud, using the actual setup screens you will see along the way.
There are two halves to this job. First, you install the Citrix Licensing component itself and set its ports. Second, you put licenses on it, either by uploading a license file the traditional way or by registering the server with Citrix Cloud and letting the License Activation Service handle it. We will walk through both.
Part 1: Installing Citrix Licensing
Citrix Licensing ships as its own setup package, separate from the Virtual Apps and Desktops installer, and it is typically installed on a dedicated Windows Server VM. Run the installer as an administrator to begin.
Step 1: Accept the License Agreement
The setup wizard opens with the Citrix Licensing License Agreement. Read through it, check the box for “I accept the terms in the License Agreement,” and click Next to continue.
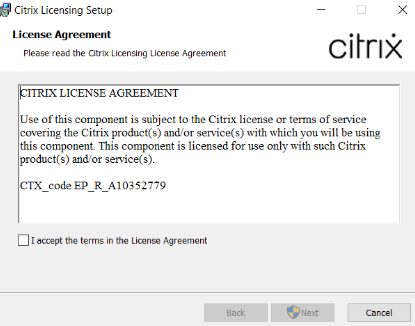
The Citrix Licensing Setup wizard — License Agreement screen.
Step 2: Let the Installer Run
Once you confirm the installation options, the wizard copies files and installs the Citrix Licensing service. This step is fully automated; just let the progress bar finish.
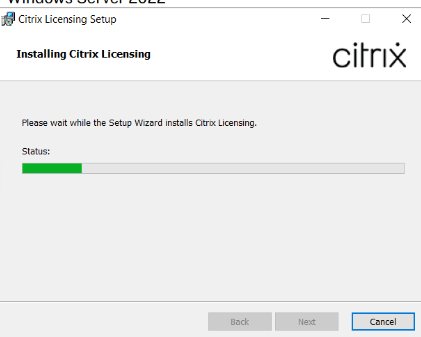
Installing Citrix Licensing — progress indicator.
Step 3: Configure the Licensing Ports
Next, the wizard asks you to configure the ports the License Server will use. Unless you have a specific reason to change them, the defaults work well for most environments:
- License Server Port: 27000 (used by products checking out licenses)
- Vendor Daemon Port: 7279 (used by the License Administration Console and reporting tools)
- Web Services for Licensing Port: 8083 (used by the web-based admin console)
Leave “Allow the installer to configure the Windows Firewall exception” checked so the required ports are opened automatically, then click Next.
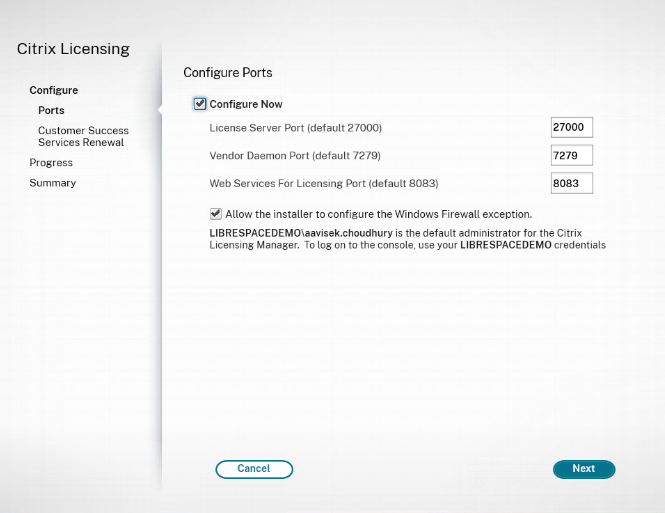
Configure Ports screen, with the default License Server, Vendor Daemon, and Web Services ports.
Step 4: Set Customer Success Services Renewal Behavior
This screen controls how the server handles Customer Success Services (CSS) renewal licenses, the subscription licenses tied to your Citrix Cloud customer agreement. You can have the server automatically check and notify you when renewals are available, automatically check and install them, or handle the process manually. Automatic notification is a sensible default for most teams, since it keeps you informed without making changes on its own.
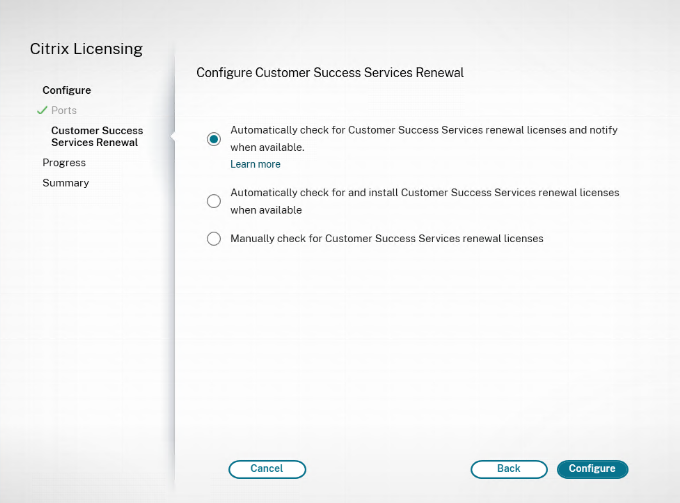
Configure Customer Success Services Renewal options.
Step 5: Configuration Progress
Click Configure and the wizard applies your port and renewal settings. This only takes a moment.
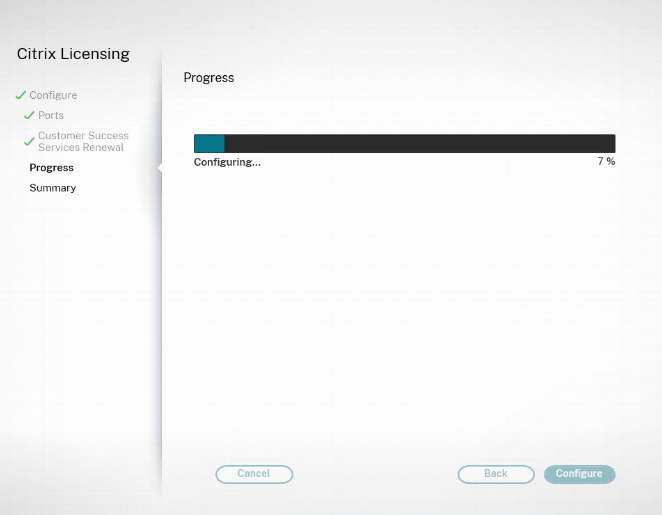
Citrix Licensing applying the configuration.
Step 6: Finish Up
When configuration completes, the Summary screen confirms that Citrix Licensing was configured successfully and reminds you which account is the default administrator for the Citrix Licensing Manager. Leave “Launch Citrix Licensing Manager” checked, choose whether you want to share license server usage data with Citrix (most environments are fine selecting “None of the above”), and click Finish.
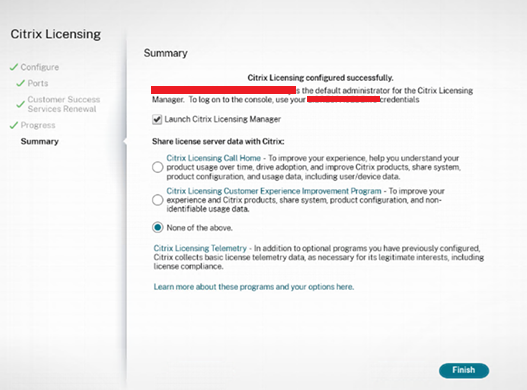
Summary screen confirming a successful Citrix Licensing configuration.
At this point the License Server itself is installed and running. The next job is to actually put licenses on it.
Part 2: Licensing the Server
Clicking Finish opens the License Administration Console, the web-based interface for managing licenses on this server (you can also reach it later at https://<your-server>:8083/web/login.html). From here you have two options: install a license file you already downloaded from Citrix, or register the server with Citrix Cloud and skip the manual file handling entirely using the License Activation Service. This walkthrough follows the Citrix Cloud registration path.
Step 7: Choose How to License the Server
The console identifies the server by hostname and IP address and presents the two licensing methods: entering a License Access Code or uploading a downloaded license file (.lic). A banner also calls out that this server supports the License Activation Service, which lets you register the server with Citrix Cloud instead of installing license files by hand. To take that route, follow the link to Settings > Register.
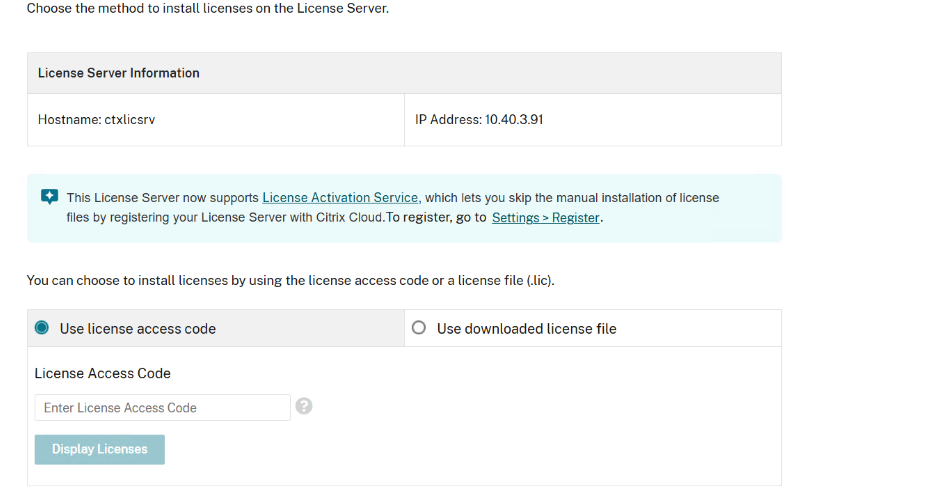
License Administration Console — choosing how to license the server.
Step 8: Open the Register Tab
Under Server Configuration, the Register tab shows the server’s current registration status. A freshly installed server will show “Not registered with Citrix Cloud,” along with the hostname, product type, MAC address, and IP address the server will present when registering. Click Register to begin.
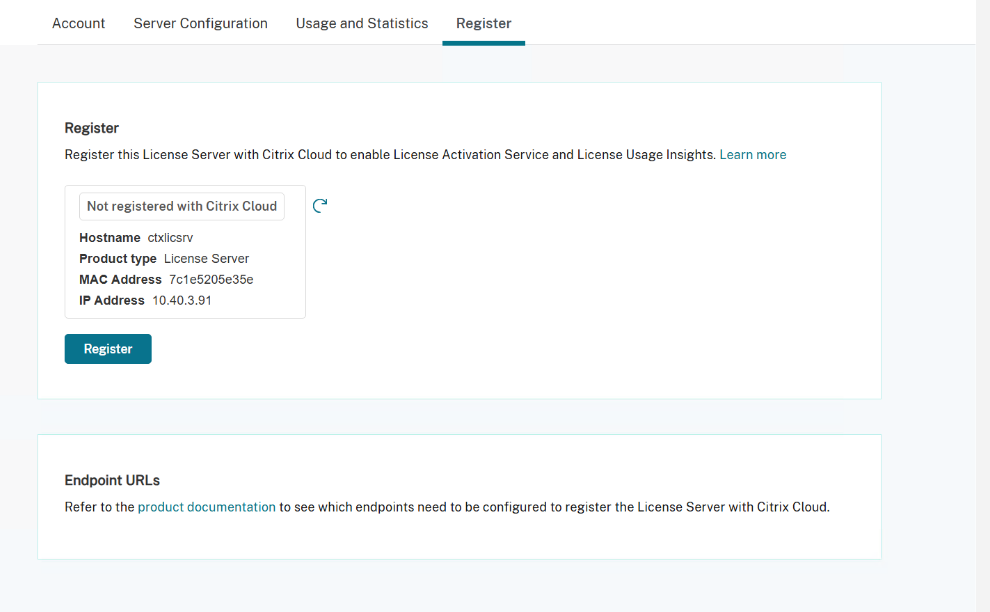
Server Configuration > Register — an unregistered License Server.
Step 9: Generate the Registration Code
The console generates a short, time-limited registration code. This is the code you’ll use on the Citrix Cloud side to link this on-premises License Server to your Citrix Cloud account. From here you can click “Go to Citrix Cloud” to jump straight there, or copy the code and navigate over manually; either way, keep an eye on the countdown, since the code expires after a short window.

Register License Server dialog showing the time-limited registration code.
Step 10: Register the Product in Citrix Cloud
In Citrix Cloud, head to Identity and Access Management > API Access > Product Registrations. This page lists every License Server, Federated Authentication Service instance, and other product already registered to the customer account. Click Register and supply the code generated in the previous step to add this License Server to the list.
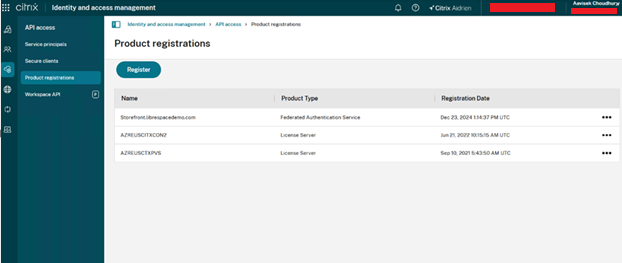
Citrix Cloud — Identity and Access Management, Product Registrations.
Step 11: Review and Confirm
Citrix Cloud shows a confirmation panel with the product type and hostname it is about to register, here License Server and ctxlicsrv. Double-check the details and click Register to finish linking the server.
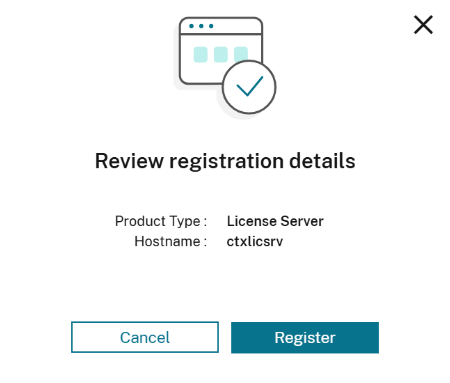
Review registration details before confirming.
Step 12: Registration Complete
Once Citrix Cloud confirms the registration, the License Server can use the License Activation Service to pull entitlements automatically, with no license file upload required. From here, you can view the component’s overview in Citrix Cloud or simply close the dialog and get back to work.
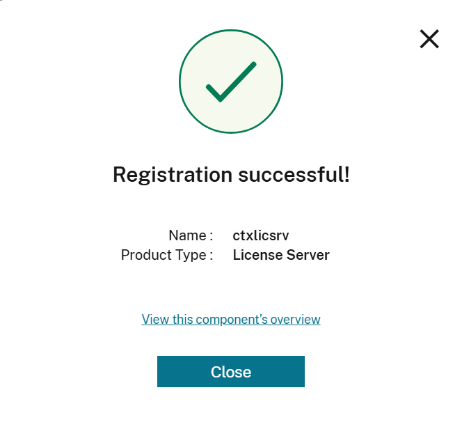
Registration successful — the License Server is now linked to Citrix Cloud.
Wrapping Up
That covers the full lifecycle: installing the Citrix Licensing service, setting its ports and renewal behavior, and getting it licensed, either by uploading a license file or, as shown here, by registering the server with Citrix Cloud so the License Activation Service handles entitlements going forward. Once registration shows as successful, the server is ready to start issuing

How to change the Disk SKU (Disk Type) of a provisioned VDI VM in Azure with the Automation Script to save the cost

How to Access Citrix Monitoring Database Data from Other Applications with O-Data REST API